Jul 25, 2015
By Jacqueline Riddle
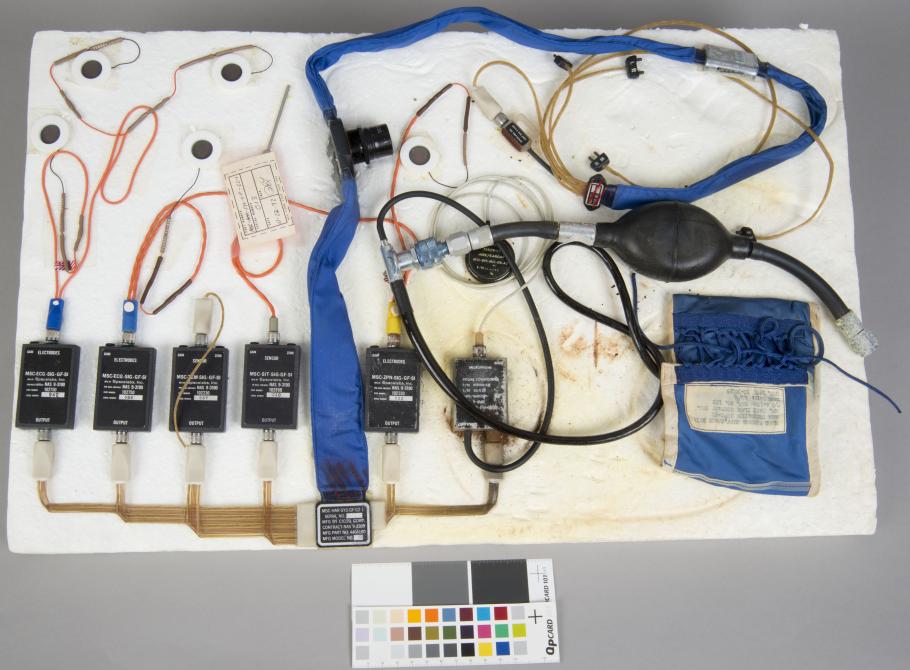
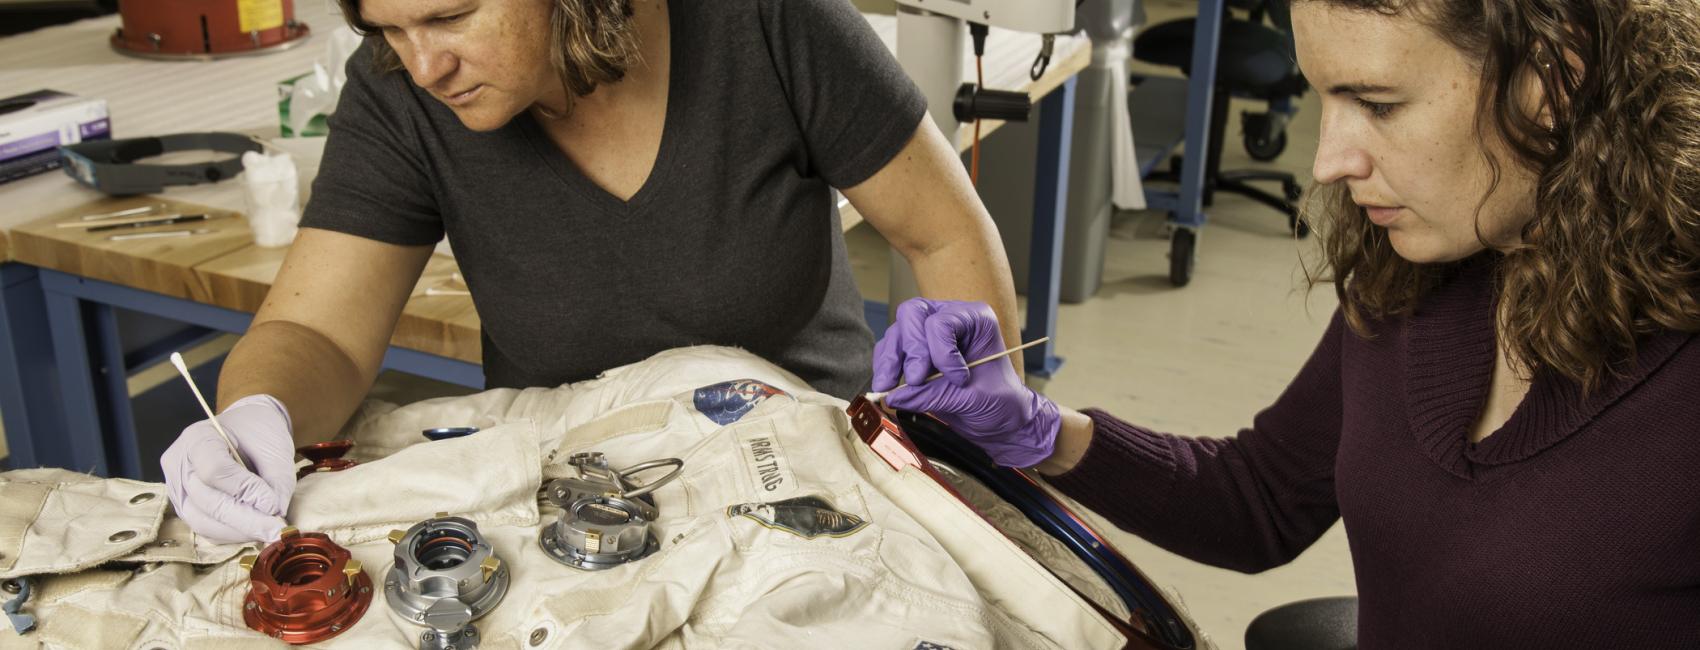
Much like medical triage, conservation triage analyzes the risk posed to an object and the hazards associated with not taking immediate action. Triage conservators ask questions such as: Can the object be handled safely by staff and researchers? Will the degradation of the object continue if it is not treated immediately? What treatment can we do, with the resources at hand, to keep this object stable as long as possible? The Collections Care and Preservation Fund (CCPF) Triage Project at the National Air and Space Museum aims to stabilize artifacts as they are moved from the Paul E. Garber Preservation, Restoration, and Storage Facility to environmentally-controlled storage at the Steven F. Udvar-Hazy Center in Chantilly, Virginia. The most common issues we deal with are corrosion, biological growth, structural instability, and hazardous materials like asbestos, cadmium, and lead. As an intern with the CCPF project, I am working with a team of conservators to examine, photo-document, and treat objects from our Aeronautics and Space History departments. One of most exciting objects entrusted to my care was a biomedical instrumentation harness from the Apollo program. Biomedical instrumentation was developed by NASA during the Mercury, Gemini, and Apollo programs to monitor the health of astronauts in flight and training. You may remember the scene in Apollo 13 where the astronauts rip off their sensors, and Jim Lovell announces dramatically, “I'm sick and tired of the entire Western world knowing how my kidneys are functioning!” While Apollo biomedical sensors did not actually monitor kidney function, they did track the astronaut’s blood pressure, body temperature, and electrocardiogram and respiratory waveforms.
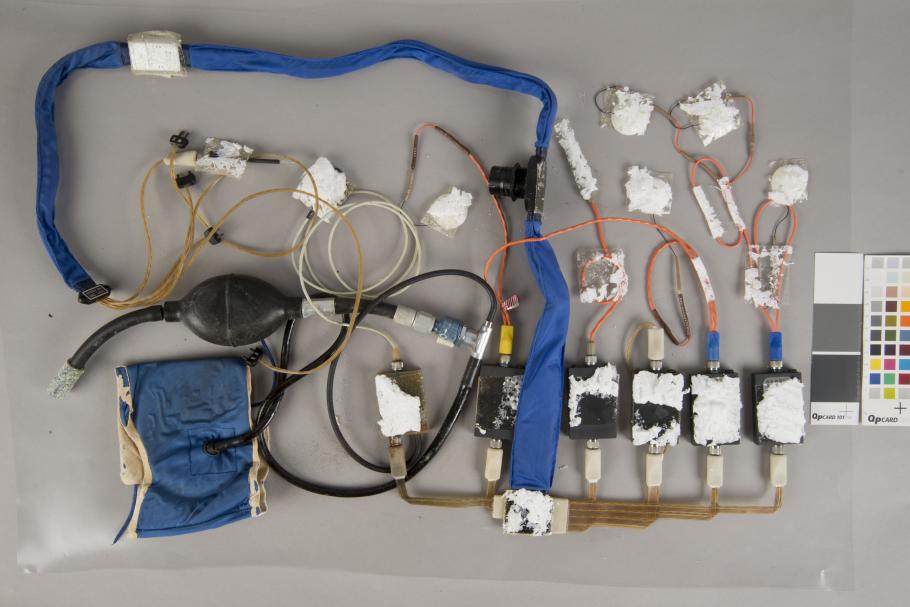
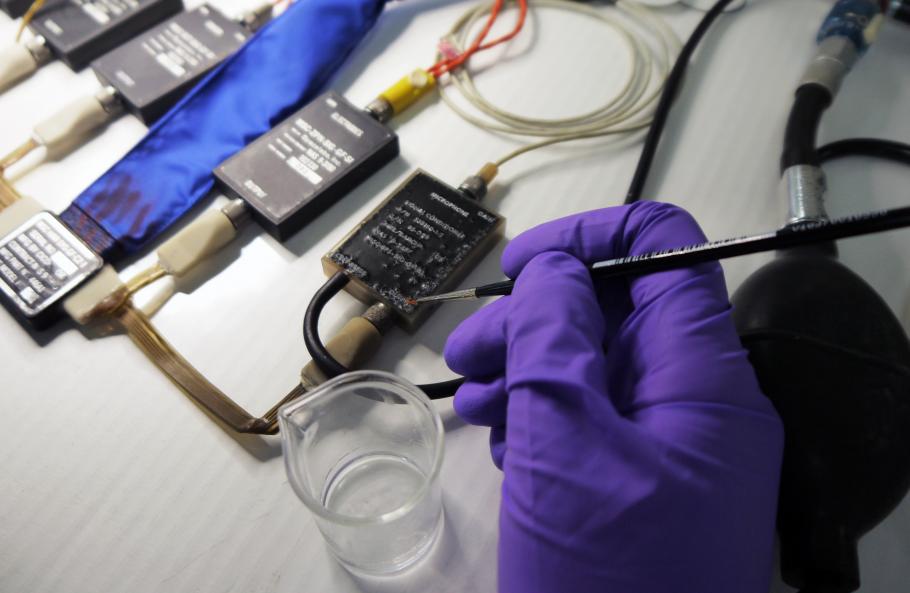
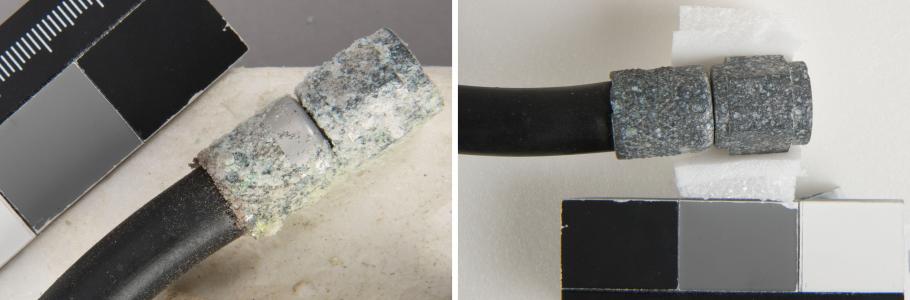
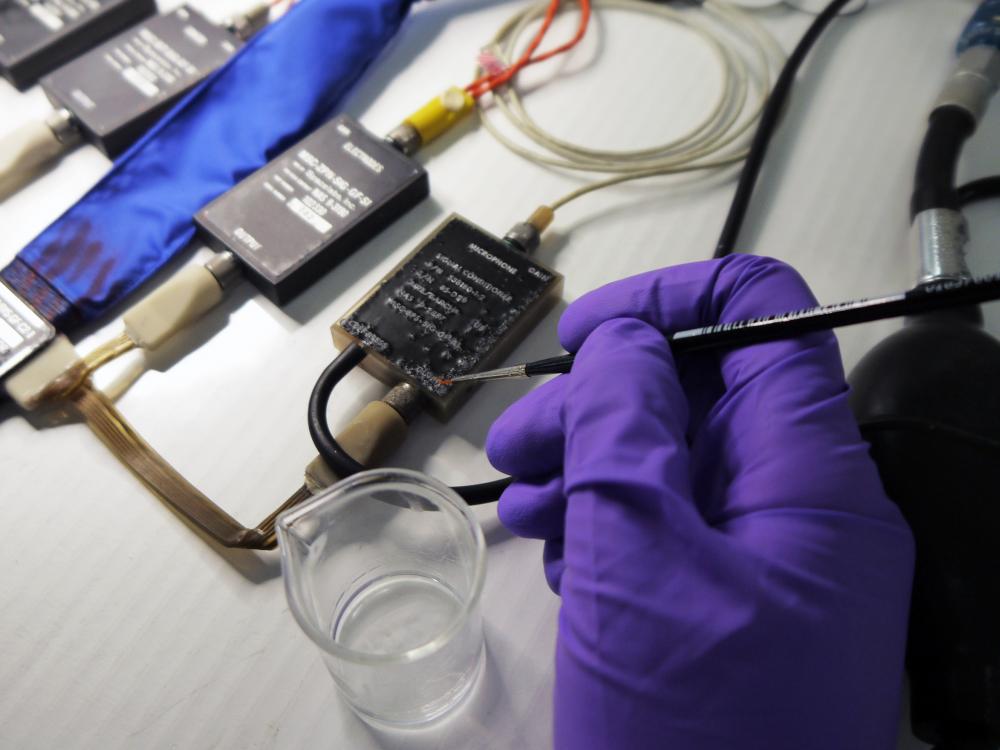
To begin treatment, I examined the harness to see what it was made of and what main problems existed. I examined it under the microscope and used a portable x-ray fluorescence spectrometer (pXRF) to analyze its metal components. I determined that the object was made of polyvinylchloride (PVC), Neoprene, rubber, epoxy, Teflon, synthetic fabric, paper, nylon, Lycra, polyurethane foam, Velcro, copper alloy, anodized aluminum, adhesive, steel, and paint. It came to the Museum’s Emil Buehler Conservation Laboratory adhered to a piece of polystyrene (Styrofoam) with double-sided tape. The primary goal of this treatment was to remove it from the polystyrene board safely and to build a custom tray so it could be safely handled and stored. It also had some other issues, including aluminum and iron corrosion, degradation of the PVC and rubber, and disintegration of the nylon textile. My first step was to remove the object from the polystyrene using a scalpel. This was done very delicately as the plastics had become stiff and brittle over time—not to mention that I didn’t want to accidentally cut the object!
I then started the tricky job of removing the double-sided tape from the back of the object. The tape could be peeled off or cut off precisely, but it left behind a sticky mess. After testing a few different methods, I discovered that the remaining adhesive could be removed from the PVC by rubbing it with a crepe eraser—something that can be found in an art supply store. Who knew?! The next step was to remove the loose iron and aluminum corrosion and coat these areas with acrylic resin or wax coating to protect them from future corrosion.
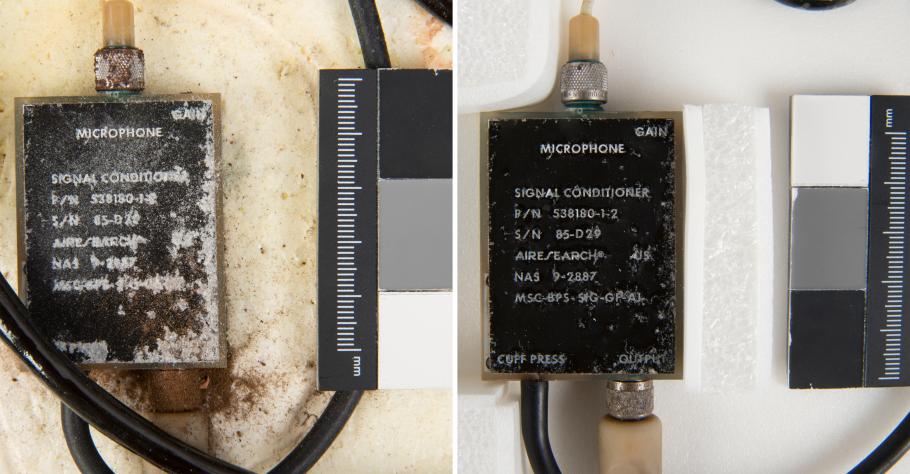
Here are a few photos from my favorite areas before and after treatment of corrosion:
With the majority of the treatment completed, the next major step was to build a custom tray so that the object could be handled in a way that is safe for it and for the handler. Since the plastics were becoming brittle, it was important to support them in a way that they would not crack and break as they were moved around. Here is the full Apollo biomedical instrumentation harness after treatment. With this project under my belt, I am ready for my next triage patient!
A special thanks to my conservation supervisor Lisa Young, curator Jennifer Levasseur, and the entire CCPF team. This project is sponsored by the Smithsonian’s Collections Care and Preservation Fund (CCPF), and administered by the National Collections Program and the Smithsonian’s Collections Advisory Committee.
We rely on the generous support of donors, sponsors, members, and other benefactors to share the history and impact of aviation and spaceflight, educate the public, and inspire future generations. With your help, we can continue to preserve and safeguard the world’s most comprehensive collection of artifacts representing the great achievements of flight and space exploration.
We rely on the generous support of donors, sponsors, members, and other benefactors to share the history and impact of aviation and spaceflight, educate the public, and inspire future generations. With your help, we can continue to preserve and safeguard the world’s most comprehensive collection of artifacts representing the great achievements of flight and space exploration.