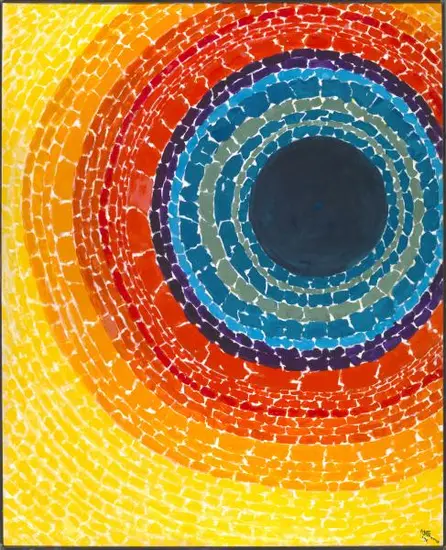
How has outer space and the universe inspired artists in their creations? 
How can art be used by scientists to share their information with the world?
Check out the activities below to explore these questions and create your own space-inspired art!

The Art and Science of Our Moon

Draw the Moon

The Moon is one of the biggest objects in the night sky, and is bright because it reflects the Sun's light. It's also the subject of inspiration for many songs, poems, paintings and art. 

Take some time to look closely at it and draw what you see!

Materials Needed:

  • piece of paper
  • a pencil and eraser
  • something to trace a small circle, like a small bowl, a glass or jar lid
  • something hard to write on

Step 1: Prepare your drawing sheet.

Gather your supplies and trace a circle on your paper. You can draw several circles in case you want to draw what you see several times.

Step 2: Go outside and look for the Moon.

When the sun has gone down, look for the Moon in the sky. You can look online or on a weather app to find out what time the Moon rises where you live.

Step 3: What can you see with your eyes? What do you notice? Draw what you see!

Step 4: Study your drawing—what can you discover?

The first thing you might've noticed on the Moon are the dark and light patches. Those colors show you the different types of rock that tell the story of what happened to the Moon.

The dark patches are called maria, which means “seas,” because people thought they looked like oceans. They don’t actually contain liquid water. They are areas that flooded with lava after big space rocks crashed into the Moon’s crust billions of years ago. They are dark because of the type of rock that is present.

The lighter places are called highlands. They are taller areas on the Moon's surface that are a lot like mountains on Earth. 

Tip: Go outside on different nights of the month and draw how the Moon changes throughout the month!
 

Galileo's sketches of the Moon, published in 1610
Painting of the Moon with Venus, shown as a star with rays and a halo

Create a Moon Mobile

Go the extra step and create a mobile from your moon drawings! Follow along with this video to make your moon three-dimensional.

Did you know it takes 27 days, 7 hours, and 43 minutes for the Moon to go around the Earth? That's almost a full month!

Materials Needed: 

  • a sheet of paper (construction or plain printer paper)
  • scissors
  • a hole punch (or a sharp pencil/ tack)
  • a piece of yarn 
  • colored pencil, marker or crayon 
  • jar lid 
  • clear tape

Step 1: Draw another moon!

Make another moon just like the one you drew in the last activity. Recreate the same process as before.

Step 2: Cut slits in the moon from the middle and slide them into one another. 

  • Cut both circles. Be careful to keep it nice and round, just like the Moon!
  • Make a dot in the center of each circle. Cut a slit in both circles, all the way to the middle dot. Be sure to just make one on the top of one circle and the bottom of the other. 
  • Slide the both slits into each other and secure with clear tape.

Step 3: 

  • Your moon is almost ready to hang. Punch holes in both circles, with either the hole punch, sharp pencil, or thumbtack. 
  • Take the yarn and string it through the holes of the moon. Keep both ends at the top and tie a knot. 
  • Take the loop of yarn and wrap it around a pencil or skewer. 


Join Museum Educator Ann Caspari and learn how to make mobile model of the planet and its Moon.

Create Your Own Constellation

Did you know that constellations were used as landmarks, or even maps in the sky? When you look in the sky at night, do you see the different shapes? What do those shapes look like? 

Constellations are a group of stars that form a recognizable pattern, like shapes or lines. You can see certain constellations in the sky depending on what time of the year it is. These "star pictures" are traditionally named after what their shapes look like, like the Big Dipper in the picture on the right.

Many cultures around the world developed many myths and legends related to constellations, and they were used for navigation, religion, farming, and more. Modern astronomers divide the sky into 88 constellations!

Have you ever looked up at the constellations and wished you had them with you in your own room?

Try this activity and you will be able to see the constellations on your ceiling!

Materials Needed: 

  • a sharp pencil
  • construction paper/printer paper
  • a flashlight
This photo of the big dipper was taken by an astronaut on the International Space Station, but you can often see this group of stars from the ground, too!

Step 1:

First, think about which constellations you like the most. You can either get inspiration from the night sky, online or by researching different formations at your local library.

This is materials for a "Create Your Own Constellation" activity.

Step 2: 

When you are ready, take your pencil and make dots to copy your constellation pattern.
 

An activity from Soar Together.

Step 3: 

With the help of a grown up, poke your pencil through each dot and make a hole.

An example of an activity for Soar Together.

Step 4: 

When you are done making holes, turn off the lights and shine the flashlight onto your paper. Look how cool the stars look! What shapes do they make?
 

An example of a Soar Together activity. 

Collections Connection: The Museum's Art Collection

Did you know that the National Air and Space Museum has one of the largest art collections at the Smithsonian? But why would an air and space museum collect art? 

The mission of our museum is to "commemorate, educate, inspire" and we collect art that tells the story of how air and space exploration, like our mission to the Moon, inspired and changed peoples' lives.

Talk About It: 

Imagine you are an artist hired by NASA to create a piece of art that would tell the story of what is happening with space exploration right now. What would you create? A drawing? A sculpture? A song? Talk to a family member about your idea and ask them what they would create.

Music Inspired by Space Exploration

Check out our Music Time playlist for music videos with songs written and performed by scientist Dr. Jim Thorne and illustrations by museum educator and artist Diane Kidd.
 

Listen Now

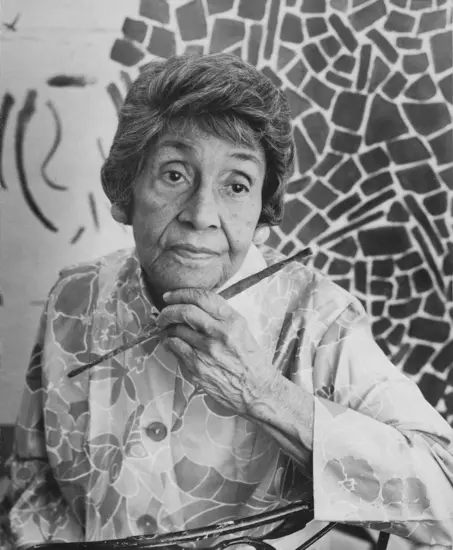
Spotlight Story: Alma Thomas, painter

Story Time Recommendations

Explore Out of the House!

Find inspiration for art by looking at the night sky and your everyday surroundings.

Activity: Take Pictures of Your Surroundings
 

A clip of a STEM in 30 episode.

Watch this video and learn how astronauts aboard the International Space Station observe the Earth from space and take photographs. They look for patterns and changes on Earth that can  help scientists who study the Earth's processes like volcanos and weather. 

Astronauts have to learn photography skills and how to use cameras so they can take useful pictures.

Practice your observation skills in your neighborhood and take pictures like the astronauts do!

Materials Needed: 

  • pencil and paper
  • something to take pictures with—this could be a phone or camera

Step 1: 

Go outside near your home with your grown-up and observe the sky, the ground and scenery around you. Take pictures to document the different details you see. 

Step 2: 

Just like any great scientist, be sure to write down the date, time, temperature, and whatever else you think is important for the journal entry. 

Step 3:

Go out to this place on different days and take pictures of the same thing. See if you can document how the scenery and temperature changes, or how certain patterns stay the same.
 

Soar Together at Air and Space is made possible by the generous support of Northrop Grumman.

Did you enjoy these activities?

Sign up for our mailing list to get notified when more activities like this become available, learn about upcoming family days, get reminders to sign up for other family-friendly programs like virtual planetarium shows and story times, and more. 

Get Email Reminders